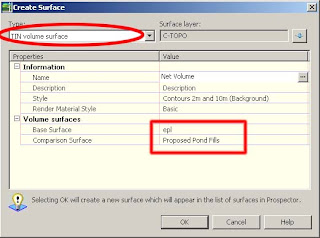
2. Next, create a new volume surface. There two methods for volume surface which are TIN volume or GRID volume. Choose either one and select your surfaces appropriately as shown in the diagram below:
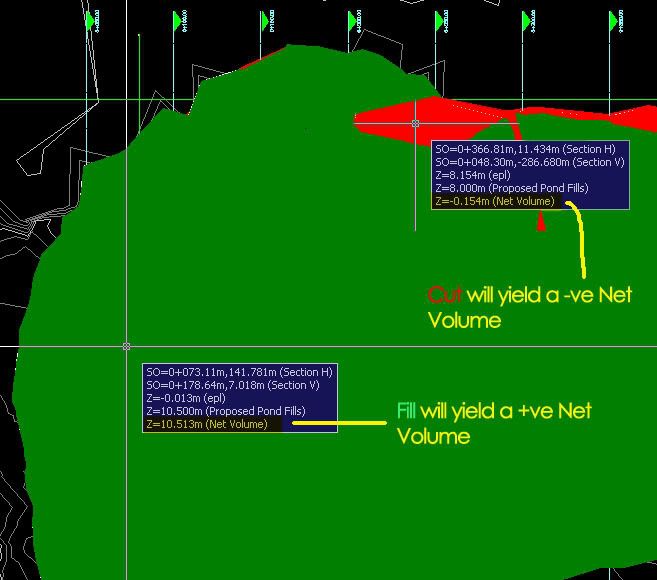
 3. Notice that when you hover your cursor (crosshair) over your Volume Surface, it will give you a +ve or –ve values depending on whether the area yield cut or fill as shown.
  4. Once you have your Volume Surface created, you can begin to generate the Cut and Fill shade. In order to do that, you’ll need to go to the surface properties and choose the Elevation Banding (2D) (provided if you’ve created your drawing via the _Autodesk Civil 3D (Metric) NCS Classic template). Buzz me if you need illumination.
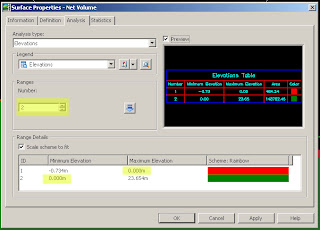
5. Subsequently, go to the Analysis tab. Choose only 2 ranges and click on run analysis. Change the Maximum Elevation values for ID no. 1 to 0 and the Minimum Elevation values for ID no. 2 to 0.
 6. Click ok and you’re done. You might observe that at times your surface doesn’t mirror the surface you have in mind. Don’t fret, make use of the edit features under the surface properties i.e.; you can add Boundaries to show only the extent if your working area, cut/fill only…etc.
7. Last but not least, I have some engineers who came to me and ask whether C3D can generate the Cut and Fill shade in hatch pattern instead of hatch solid. Well the there is a workaround. The good thing with C3D is it comes together with AutoCAD and therefore it has the best of both worlds. What you need to do is to export the completed drawing to AutoCAD (File>Export>Export to AutoCAD)
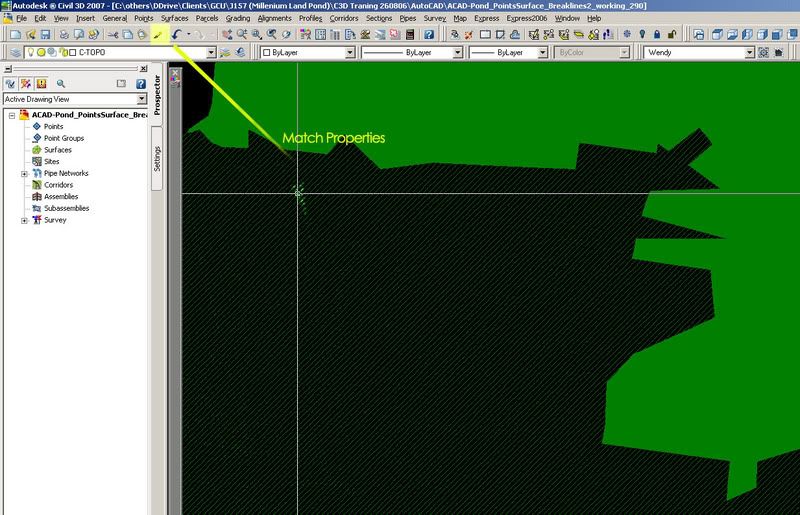
8. Open your drawing using Civil3D as AutoCAD and you’ll notice that the solid hatch representing the cut and fill is not in 1 piece. This is the tedious part. You’ll need then to edit the hatch solid to another hatch pattern of your choice and inherit the properties using Match Properties. It’s not that hard after all…
 Happy trying.
Tác giả : Wendy Lim Petaling Jaya, Selangor, Malaysia


